When importing POS data, the ASCII Text Import Wizard field page prompts you to map the fields in the text file to the fields in your recipe database. You effectively tell the wizard what each of the fields in the text file are called.
See the following image.
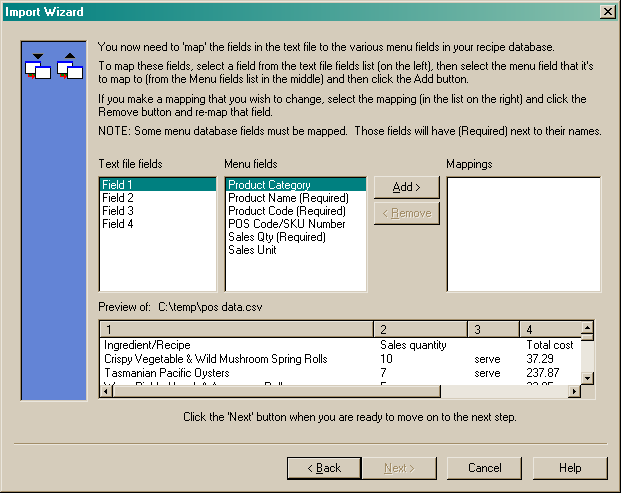
Import wizard uses the delimiter character settings from the previous page to break the individual lines in the text file into separate fields of information. This is displayed in the preview list at the bottom of this page. The example data above shows there were four (4) fields found per line and they are listed in separate columns in the preview pane.
Now you need to interpret what each of the fields in the text file represents. In the example data above, we can see that the first field is the name of the menu item, the second field is the sales quantity, the third, the sales unit etc.
You use the lists boxes in this page to set up the mappings for each of the fields in the text file. See the following image.
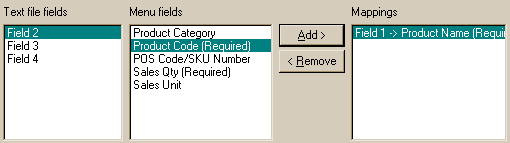
For instance, to tell the wizard that the first field in the text file is the menu item's name, select "Field 1" in the "Text file fields" list box, select "Product Name" in the "Menu field" list box and click the "Add" button. The wizard will add those selections to the "Mappings" list box. See above.
You can then proceed to set up mappings for all of the other fields in the text file. Keep in mind that some of the fields in the text file may be superfluous, and in those cases, ignore those fields.
The image below shows all of the fields required, mapped from the text file to our recipe database. Note: In this example, we do not require the total cost to be transferred over to our recipe database, so we have not mapped it.
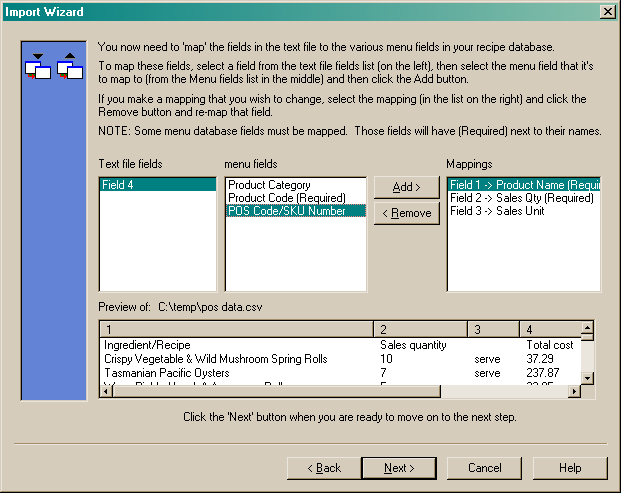
NOTE: Although the dialog above states that menu fields with "Required" beside them must be included, this is not exactly the case. As long as you have a purchase quantity and purchase unit field selected, some of the other "required" fields may be ignored. If the 'Next' button is enabled in the Wizard, then you have selected sufficient 'required' fields.
If you are satisfied with your selections, click the "Next" button to move to the Save changes page.