The database snapshot tool allows you to take a 'snapshot' or copy of the current recipe database and save it to a selected file and drive as a compressed archive (ZIP) file. Most often the snapshot file is created in the same drive and folder as your main database file, but you can change this at the time of taking the snapshot.
Database snapshots are best performed before starting a major import or similar operation that may alter your database irreversibly.
NOTE: Although a database snapshot effectively makes a copy of your database, it is no substitute for a proper database backup. Database snapshots copy your data to a local hard drive whereas a proper backup copies your data to a remote disk(ette). Should any of the hard drives on your computer fail, any database snapshots you have taken will almost certainly be lost along with your database, whereas your backups disk(ettes) will still have a valid copy of your data.
To launch the database snapshot facility use one of the following methods:
•Select File->Snapshot from the menu bar or
•Click on the ![]() toolbar button
toolbar button
The following dialog will be displayed.
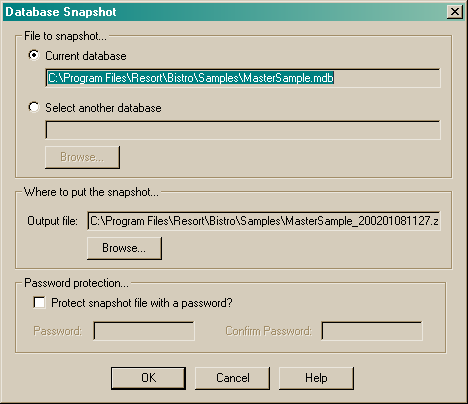
The above dialog is separated into three main sections. They are:
•File to snapshot
•Where to put the snapshot
•Password protection
File to snapshot
The file to snapshot section allows you to determine which file you wish to make a copy of. You can select to snapshot the current database or select another database. If the file you require to copy is the current database you are in, the file name will be displayed in the "Current database" section. If you wish to select another database to take a snapshot of, click the radio button beside the "Select another database" option. You must click the "Browse" button to select the file you wish to snapshot. After clicking the "Browse" button, the following dialog will appear.
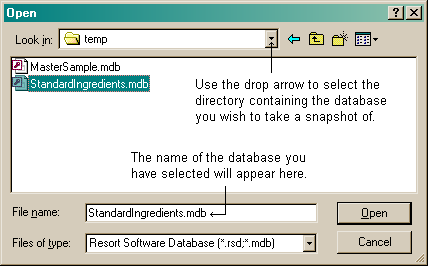
Browse your way, using the drop arrow, to the directory containing the database you wish to take a snapshot of. Select the database and click the "Open" button. The name of the selected database will now appear in the "Select another database" field as per the following image.
Where to put the snapshot
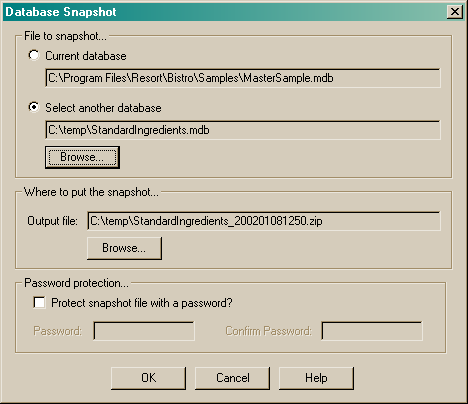
The where to put the snapshot section allows you to choose where on your computer you wish to store the temporary snapshot file. If you do not wish to save the file to the default setting, click the "Browse" button to select an alternative directory. See the following image.
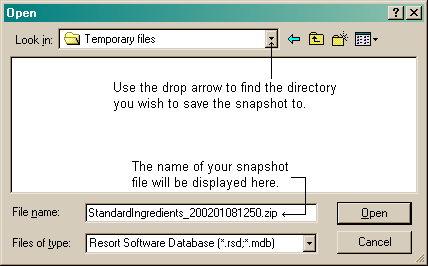
The selected directory will now be displayed in the "Where to put snapshot" field. See the following image.
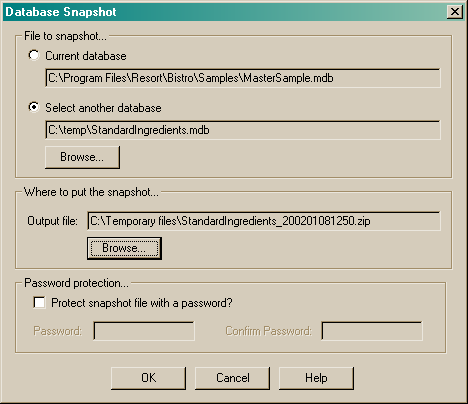
Password protection
The password protection section allows you to allocate a password to the snapshot file. If you wish to allocate a password, mark the "Protect snapshot file with a password?" check box and type in the password. Confirm the password by re-entering it in the "confirm password" field.
When you are satisfied with all your selections, click the "OK" button to begin the snapshot process.
Once the process is completed you will be returned to the last opened form.